
This
tutorial was written on Sunday November 4th 2012 by
Mystery Designs. It was written in PSP X2 and assumes a good, working
knowledge of the program. Any similarity to other tutorials is purely
coincidental and not done intentionally. Please do not copy or
claim the tutorial as your own. Please link to my blog should groups
or forums use it in challenges, and please leave me a comment with a
link to where it is being used. Thanks :)
**Supplies
Needed**
3
Tubes by your artist of choice. I am using 3 girls by Roman Zaric,
which you can purchase in his store HERE
Kit
of choice. I am using the one which matches Roman Zaric's “Saly”
tube, which you can also purchase in his store HERE
Template
- “Temp 87” by Pooker of Elegant Inspirations HERE
Mask
- “DBV Mask 89” by Designs by Vaybs HERE
Font
Used – Things We Said
**Plugins**
Tramages
– Cyber Mosh
Tramages
– Tow The Line
Tramages
– Sliding Spirals
Eyecandy
– Glass
Open
up your tubes
Shift+d
to duplicate
Minimize
the duplicates
Close
the originals
Open
up your template
Shift+d
to duplicate
Close
the original
Delete
layer “CR Info”
This
template is quite large, but don't worry, we can always resize later
on ;)
Highlight
layer “Background”
Grab
your Floodfill tool, and fill this layer with white #ffffff
Layers
– New Raster Layer and rename “mask”
Grab
your Floodfill Tool again
Change your Background to #c1dcec
Floodfill
your mask layer
Layers
– Load/Save Mask – Load Mask From Disk
Choose
“DBV Mask 89” with these settings :

Resize
your mask layer by 120%
Open
up “SR-Paper2” from the kit and minimize it
Highlight
layer “Black Circle2”
Selections
– Select All – Float – Defloat
Layers
– New Raster Layer and rename “black circle2a”
Grab
your Floodfill Tool
Change
your Background to “Pattern”
Choose
SR-Paper2 – Angle: 0, Scale: 100
Fill
your selection
Selections
– None
Grab
your Change To Target Brush
Change
your Foreground colour to #56707b
Colourise
the paper
Delete
layer “Black Circle2”
Highlight
layer “Black Circle1”
Selections
– Select All – Float – Defloat
Layers
– New Raster Layer and rename “black circle1a”
Grab
your Floodfill Tool
Fill
your selection using the same paper from before
Selections
– None
Grab
your Change To Target Brush
Colourise
the paper again using the same colour from before
Delete
layer “Black Circle1”
Highlight
layer “Black Rect”
Selections
– Select All – Float – Defloat
Layers
– New Raster Layer and rename “black recta”
Open
“SR-Paper7” from the kit and minimise it
Grab
your Floodfill Tool
Change
the Background pattern to Paper7 – Angle : 0, Scale : 100
Floodfill
your selection
Selections
- None
Grab
your Change To Target Brush
Colourise
the paper, once again using the same colour as before (#56707b)
Delete
layer “Black Rect”
Highlight
layer “Pink Dots Back”
Selections
– Select All – Float – Defloat
Layers
– New Raster Layer and rename “pink dots backa”
Grab
your Floodfill Tool
Change
your Foreground colour to #aacfe4
Fill
your selection
Layers
– Duplicate and rename “pink dots backb”
Effects
– Plugins – Tramages – Cyber Mosh with these settings :

Selections
– None
Change
the Blend Mode to “Luminance Legacy”
Lower
the Opacity to around 22
Highlight
layer “pink dots backa” again
Effects
– Plugins – Eyecandy – Glass with these settings :


Delete
layer “Pink Dots Back”
Highlight
layer “Pink Dots Front”
Selections
– Select All – Float – Defloat
Layers
– New Raster Layer and rename “pink dots fronta”
Grab
your Floodfill Tool, still set on colour #aacfe4
Fill
your Selection
Layers
– Duplicate and rename “pink dots frontb”
Effects
– Plugins – Tramages – Cyber Mosh
Use
the same settings as earlier
Selections
– None
Change
the Blend Mode to “Luminance Legacy”
Lower
the Opacity to around 22
Highlight
layer “pink dots fronta”
Effects
– Plugins – Eyecandy – Glass
Use
the same settings as earlier
Delete
layer “Pink Dots Front”
Highlight
layer “Lilac Doots Back”
Selections
– Select All – Float – Defloat
Layers
– New Raster Layer and rename “lilac dots backa”
Grab
your Floodfill Tool
Change
your Foreground to #28414b
Fill
your selection
Adjust
– Add/Remove Noise – Add Noise with these settings :

Effects
– 3D Effects – Inner Bevel with these settings :

Selections
– None
Delete
layer “Lilac Doots Back”
Highlight
layer “Lilac Dots Front”
Selections
– Select All – Float – Defloat
Layers
– New Raster Layer and rename “lilac dots fronta”
Grab
your Floodfill Tool, Foreground still set on #28414b
Fill
your selection
Adjust
– Add/Remove Noise – Add Noise with the previous setting
Effects
– 3D Effects – Inner Bevel with the previous settings
Selections
– None
Delete
layer “Lilac Dots Front”
Highlight
layer “Yellow Dots Back”
Selections
– Select All – Float – Defloat
Layers
– New Raster Layer and rename “yellow dots backa”
Grab
your Floodfill Tool
Change
your Foreground to #625854
Fill
your selection
Layers
– Duplicate and rename “yellow dots backb”
Effects
– Plugins – Tramages – Cyber Mosh
Use
the settings from earlier in the tut
Selections
– None
Change
the Blend Mode to “Luminance Legacy”
Lower
the Opacity to around 22
Highlight
layer “yellow dots backa”
Effects
– Plugins – Eyecandy – Glass
Use
the settings from earlier in the tut
Delete
layer “Yellow Dots Back”
Highlight
layer “Yellow Dots Front”
Selections
– Select All – Float – Defloat
Layers
– New Raster Layer and rename “yellow dots fronta”
Grab
your Floodfill Tool, colour #625854
Fill
your selection
Layers
– Duplicate and rename “yellow dots frontb”
Effects
– Plugins – Tramages – Cyber Mosh
Use
the settings from earlier in the tut again
Selections
– None
Change
the Blend Mode to “Luminance Legacy”
Lower
the Opacity to around 22
Highlight
layer “yellow dots fronta”
Effects
– Plugins – Eyecandy – Glass
Use
the previous settings again
Delete
layer “Yellow Dots Front”
Highlight
layer “Blue Dots Back”
Selections
– Select All – Float – Defloat
Layers
– New Raster Layer and rename “blue dots backa”
Grab
your Floodfill Tool
Change
your Forgeound colour to #56707b
Fill
your selection
Selections
– None
Effects
– Plugins – Tramages – Tow The Line with these settings :

Effects
– 3D Effects – Inner Bevel
Use
the previous settings from earlier
Delete
layer “Blue Dots Back”
Highlight
layer “Blue Dots Front”
Selections
– Select All – Float – Defloat
Layers
– New Raster Layer and rename “blue dots fronta”
Grab
your Floodfill Tool, Foreground colour still set on #56707b
Fill
your selection
Selections
– None
Effects
– Plugins – Tramages – Tow The Line
Use
the same settings again
Effects
– 3D Effects – Inner Bevel
Same
settings as before
Delete
layer “Blue Dots Front”
Highlight
layer “Black Circle”
Adjust
– Brightness and Contrast – Brightness/Contrast :
Brightness
: 255
Contrast
: 10
Selections
– Select All – Float – Defloat
Selections
– Modify – Contract 24 pixels
Hit
delete
Selections
– Select All – Float – Defloat
Effects
– Plugins – Eyecandy – Glass
Use
the same settings from before
Selections
– None
Layers
– Arrange – Move Up
Highlight
layer “Frame”
Selections – Select All – Float –
Defloat
Effects
– Plugins – Eyecandy – Glass
Use
the previous settings again
Selections
– None
Highlight
layer “Grey Circle”
Selections
– Select All – Float – Defloat
Your
Foreground should still be set on #567076
Change
your Background colour to #ffffff
Background
– Gradient – Foreground/Background with these settings :

Fill
your selection
Effects
– Plugins – Tramages – Sliding Spirals with these settings :

**Do
Not Deselect**
Grab
one of your tubes
Copy
– Paste – As New Layer and rename “tube1”
Arrange
over the selected area, so that your tube shows on the left-side of
your circle like so :

Selections
– Invert
Hit
delete
Highlight
layer “Background”
Selections
– Select All
Highlight
your “tube1” layer
Image
– Crop to selection
Change
your Blend Mode to “Luminance Legacy”
Lower
the Opacity to around 48
Layers
– Duplicate and rename “tube1a”
Adjust
– Blur – Radial Blur with these settings :

Change
the Blend Mode to “Hard Light”
Opacity
to around 57
Highlight
layer “Grey Circle”
Selections
– Select All – Float – Defloat
Grab
your second tube
Copy
– Paste – As New Layer and rename “tube2”
Arrange
over your selected area, so that your tube shows on the right-side of
your circle like so :

Selections
– Invert
Hit
delete
Highlight
layer “Background”
Selections
– Select All
Highlight
layer “tube 2”
Image
– Crop To Selection
Change
the Blend Mode to “Luminance Legacy”
Opacity
to around 57
Layers
– Duplicate and rename “tube2a”
Adjust
– Blur – Radial Blur
Use
the same settings from before
Change
the Blend Mode to “Hard Light”
Opacity
to around 61
Highlight
layer “blue dots fronta”
Grab
your third tube
Copy
– Paste – As New Layer and rename “tube3”
Arrange
in the middle of your tag
Add
a drop shadow of choice
At
this point, please feel free to add any elements from the kit you
wish. Below are merely guidelines for the tag I made above.
Open
“SR-Element9” from the kit
Copy
– Paste – As New Layer and rename “flower bunch1”
Image
– Resize – 75%
Arrange
over on the bottom-right of your tag like so :

Layers
– Duplicate and rename “flower bunch2”
Image
– Mirror
Drag
this layer down in your Layer Palette so that it is below layer
“tube3”
Highlight
layer “flower bunch1” again
Layers
– Duplicate and rename “flower bunch3”
Image
– Free Rotate with these settings :

Move
over to the left slightly, still along the bottom of your tag like so
:

Layers
– Duplicate and rename “flower bunch4”
Image
– Mirror
Drag
this layer down in your Layer Palette so that it is below layer
“tube3”
Add
a drop shadow to all four flower bunch layers
Highlight
layer “flower bunch3”
Open
up “SR-Element3” from the kit
Copy
– Paste – As New Layer and rename “blue flower”
Image
– Resize 25%
Arrange
over on the top-right of your tag, over the dotted line like so :

Add
a drop shadow
Layers
– Duplicate and rename “blue flowera”
Arrange
over on the bottom-left of your tag, along the other dotted line like
so :

Drag
this layer down in your Layer Palette so that it is below layer
“flower bunch2”
Highlight
layer “blue flower”
Open
up “SR-Element2” from the kit
Copy
– Paste – As New layer and rename “white flower1”
Image
– Resize 55%
Arrange
along the bottom of your tag like so :

Layers
– Duplicate and rename “white flower2”
Image
– Mirror
Arrange
over on the bottom-right of your tag like so :

Drag
this layer down in your Layer Palette so that it is below layer
“flower bunch3”
Layers
– Duplicate and rename “white flower3”
Arrange
so that the flower pops out from behind the flower bunches like so :

Layers
– Duplicate and rename “white flower4”
Arrange
over on the bottom left-hand side of your tag like so :

Drag
this layer down in your Layer Palette so that it is below layer
“tube3”
Add
a drop shadow to all four white flowers
Highlight
layer “white flower1”
Open
up “SR-Element11” from the kit
Copy
– Paste – As New Layer and rename “bubbles1”
Arrange
over on the right-hand side of your tag
Change
the Blend Mode of the layer to “Overlay”
Drag
the layer down in your Layer Palette so that it is below layer
“tube3”
Layers
– Duplicate and rename “bubbles2”
Image
– Mirror
Highlight
layer “white flower1” again
Open
up “SR-Element22” from the kit
Copy
– Paste – As New Layer and rename “pop1”
Image
– Resize – 45%
Image
– Free Rotate with these settings :

Arrange
over on the right-hand side of your tag like so :

Drag
this layer down in your Layer Palette so that it is below layer
“flower bunch4”
Add
a drop shadow
Highlight
layer “white flower1”
Open
up “SR-Element24” from the kit
Copy
– Paste – As New Layer and rename “pop2”
Image
– Resize 45%
Image
– Free Rotate with these settings :

Arrange
over on the left-hand side of your tag like so :

Drag
this layer down in your Layer Palette so that it is below layer
“flower bunch4”
Add
a drop shadow
Highlight
layer “white flower1”
Open
up “SR-Element23” from the kit
Copy
– Paste – As New Layer and rename “choc1”
Image
– Resize – 25%
Arrange
over on the bottom-left of your tag like so :

Layers
– Duplicate and rename “choc2”
Image
– Mirror
Arrange
on the bottom-left again, next to the previous choc like so :

Layers
– Duplicate and rename “choc3”
Image
– Free Rotate with these settings :

Arrange
in the middle of the previous two chocs like so :

Add
a drop shadow to all three choc layers
**If
you would like to resize your tag, now is the time to do so**
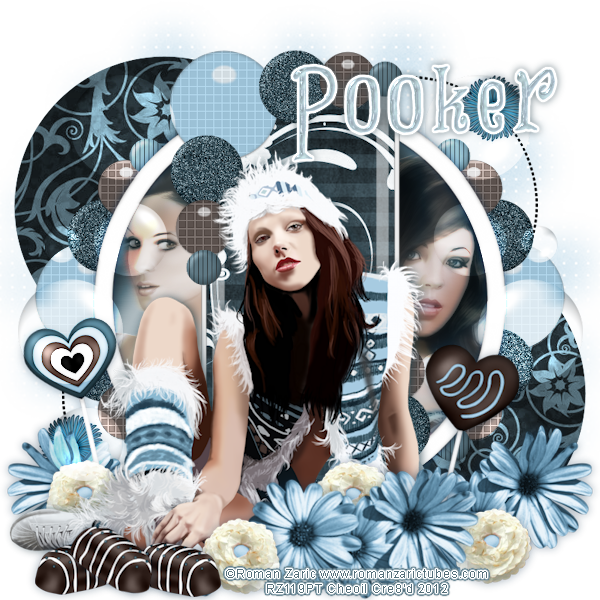
I
resized my tag by 75%, which made it 600x600 pixels :)
Add
your name and all copyrights.
Save
your finished tag and you’re done!

No comments:
Post a Comment