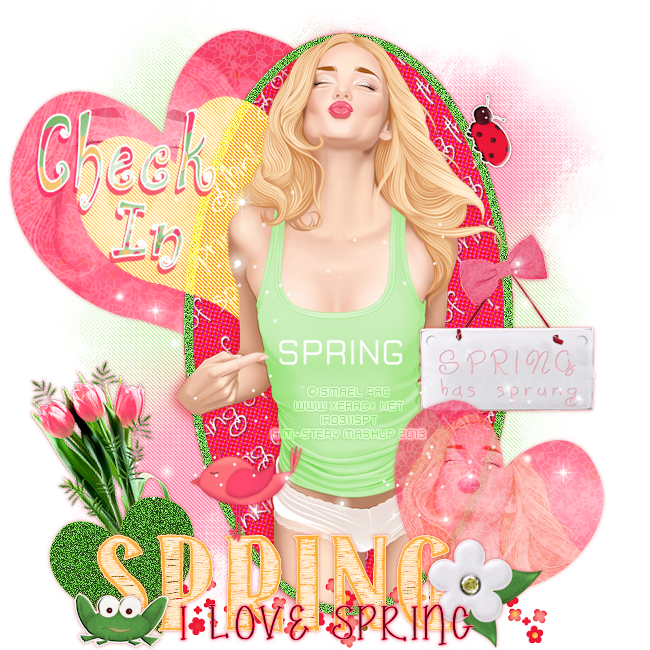
Showing posts with label Ismael Rac. Show all posts

Tuesday, 11 June 2013

Hot Denise - Facebook Timeline Cover

Another Facebook Timeline Cover for peeps.  This is also to use *AS IS*  No alterations please.

It uses Ismael Rac's New Release "2013 Pretty Denise" and her matching kit, both available over at his store here.  Enjoy xx


Smoken Hot - Snags

Hi peeps,

just a fleeting visit for now to share some snags.  These were made with a new release from Mr Ismael Rac called "2013 Pretty Denise" & her matching kit, both of which can be bought in the store here

As always, please only use these as they are, no changes.  Please also do not hotlink my files, save them to your own photo storage.  Thanks and enjoy! x


Saturday, 1 June 2013

"Dark N Sexy" & "Love Story" Facebook Timeline Covers


Anyone care for some more Facebook Timeline Covers?

I made both of these tonight, so sharing them here for peeps.

Same as with the snags, they are for use *AS IS* - no alternations please, and please do not share them via email etc.  Thanks :)


Made with the "Dark N Sexy" Kit which is part of the Collab Party Kits Bundle over at the Xeracx Store


Made with the "Sweet Taylor" Kit which is also part of the Collab Party Kit Bundle


You can either buy this awesome collab flat out - that's 11 kits and 1 CU pack OR you can get it free with a 10$ purchase on tubes from the store :) These kits match a variety of Rac tubes and are jam-packed full of elements and papers to play with that compliment a range of Rac's awesome art.

**TUBES ARE NOT INCLUDED IN THE BUNDLE**

Check them out over at the store ~ http://xeracx.net/store/


Meet Me At The Beach - Snags

A new day.....and some more new snaggables for peeps :)

This is another take on Ismael Rac's "2013 Hat Girl" using the second matching kit.
They are available NOW over in his store ~ HERE

As always, please only use these *as they are*.  No alteration, no hotlinking my files.  Please upload them to your own photo storage but no sharing through e:mail etc.  Thanks and enjoy xx


You can also find these over on Facebook HERE
Or over in the KIT Forum HERE


New Releases - Ismael Rac

**New Releases** (1st June 2013)


New Releases to get your June off to a hot start. New tubes and kits. Some tubes were so hot the kit team had to make double kits for them so you get a lot to play with for the same awesome low price. Also you can get the new kits on their own or with tube so you have a choice. Plus you can still get the pack and pack plus kits. So many great ways to feed the Rac tube sweet tooth.

Check them out NOW over in the store!!


Let Freedom Ring - Snags

Last taggies for today peeps :)   These are made with an up-coming release from Ismael Rac called "2013 Hat Girl" & one of her matching kits.  I will have some more taggs tomorrow with her other kit, and maybe a tutorial ;)  But for now, there are some snaggables below.    Keep your eyes open for this one, as you won't want to miss it.  The tube itself comes with lots and lots of layers to play with and both kits have many beautiful elements to add that finishing touch to your tag.

As always, please only use these *as they are*.  No alterations.  And please do not hotlink my files.  Please upload them to your own photo storage too, but no sharing through e:mail etc.  Thanks and enjoy xx


Saturday, 25 May 2013

I Love Spring - Snags

Hi peeps,

I completely forgot I had made these to share with you here when I did the tutorial "I Love Spring" the other day *oops*.  Anyways, better late than never right?  lol

Please remember not to hotlink to my files - save them to your own photo-storage before use.  Thanks!  Also please do not alter them or share them through email groups etc.  Please direct peeps to my blog to download.  Thanks :)


Wednesday, 15 May 2013

"I Love Spring" - Tutorial (FTU Kit)


**Supplies Needed**

Tube – Ismael Rac “2013 Kiss” HERE

Kit - “Thinking Of Spring” by Leah from Gimptastic Tuts HERE
I used Leah's portion

Template – Mine “I Love Spring” HERE

Mask – “Vix_BigMask 018” HERE


**Plugins**

Penta.com - Jeans


Open your tube
Shift+d to duplicate
Minimize it for the moment
Close the original

Open the template
Shift+d to duplicate
Close the original

Hide/delete the “copyright” layer

Highlight the “oval” layer

Selections – Select All – Float – Defloat

Open up Paper 11 from the kit and mimimize it

Grab your Floodfill Tool

Change your Background to Pattern – Paper 11

Angle 0, Scale 100

Floodfill your selection

Selections – None

Highlight layer “oval border”

Grab your Change To Target Brush – Foreground Colour #a9e390

Recolour the oval border

Highlight layer “heart4”

Change To Target Brush – Colour #a9e390

Recolour the heart

Highlight layer “heart1”

Selections – Select All – Float – Defloat

Layers – New Raster Layer and rename “heart1a”

Open up Paper 2 from the kit and mimimize it

Grab your Floodfill Tool

Change your Background to Pattern – Paper 2

Angle 0, Scale 100

Floodfill your selection

**Do Not Deselect*

Grab your tube

Copy – Paste – As New Layer and rename “tube1”

Arrange it over the heart selection

Selections – Invert and hit delete

Selections – None

Change the Blend Mode to “Luminance (L)”

Lower the Opacity to around 34

Delete layer “heart1”

Highlight layer “heart2”

Selections – Select All – Float – Defloat

Layers – New Raster Layer and rename “heart2a”

Grab your Floodfill Tool

Same settings – Paper 2, Angle 0, Scale 100

Fill your selection

**Do Not Deselect**

Copy – Paste your tube As New Layer and rename “tube2”

Arrange over your selection

Selections – Invert and hit delete

Selections – None

Change the Blend Mode to “Hard Light”

Lower the Opacity to around 52

Delete layer “heart2”

Highlight layer “heart3”

Selections – Select All – Float – Defloat

Layers – New Raster Layer and rename “heart3a”

Grab your Floodfill Tool

Change your Foreground Colour to #fec472

Fill your selection

Selections – None

Effects – Plugins – Penta.com – Jeans
Use the default settings :


Change the Blend Mode to “Hard Light”

Delete layer “heart3”

Highlight layer “wordart1”

Grab your Change To Target Brush – Foreground Colour #fec472

Recolour the wordart

Highlight layer “wordart2”

Grab your Change To Target Brush – Foreground Colour #fe8aa3

Recolour the wordart

Highlight layer “bg”

Layers – New Raster Layer and rename “mask”

Grab your Floodfill Tool

Change your Background to Gradient – Foreground/Background with these colours :

#c2ecaf & #fe8aa3

Radial, Angle 304, Repeats 3

Invert Un-Checked

Fill your mask layer with the gradient

Layers – Load/Save Mask – Load Mask From Disk

Choose “Vix_BigMask018” with these settings :


Merge the mask group

Effects – Plugins – Penta.com – Jeans
Use the default settings from before

Highlight layer “oval border” again

Grab your tube

Copy – Paste – As New Layer and rename “main tube”

Arrange over the oval in the centre of your tag

Once happy with the placement

Layers – Duplicate and rename “main tube copy”

Move this copy layer down in your Layer Palette so it is below the “oval border” layer

Your Layer Palette should look like this


Hide the “main tube copy” layer for a moment

Highlight “main tube” layer

Grab your eraser tool

Carefully remove any of the tube which overlaps the bottom of the oval like so :


Highlight layer “oval border”

Grab your Magic Wand Tool

Select inside the border

Selections – Modify – Expand – 2 Pixels

Selections – Invert

Highlight and un-hide the “main tube copy” layer

With your eraser tool, carefully remove any of the tube which overlaps the bottom of the oval again


Selections – None

Highlight layer “heart3a”

Drag this layer down in your Layer Palette until it is above the “oval border” layer

Your Layer Palette should look like this :


Highlight your top layer - “wordart2”

Open up “_flower1” from the kit

Copy – Paste – As New Layer and rename “flower1”

Image – Resize – 35%

Arrange over on the bottom-right of your tag, by the letter “g” in Spring

Layers – Arrange – Move Down

Open up “_flower bunch” from the kit

Copy – Paste – As New Layer and rename “flower bunch”

Image – Resize – 65%

Image – Free Rotate :


Adjust – Sharpness – Sharpen

Arrange over on the left-hand side of your tag by the small heart (“heart4”)

Drag the layer down in your Layer Palette so it is below the “heart4” layer

Highlight your “wordart2” layer again

Open up “_flower scatter” from the kit

Copy – Paste – As New Layer and rename “flower scatter”

Image – Resize – 45%

Arrange on the bottom edge of your tag by the wordart like so :


Drag this layer down in your Layer Palette until it is above your “main tube” layer

Still with your “flower scatter” layer highlighted

Open up “_sign” from the kit

Copy – Paste – As New Layer and rename “sign”

Image – Resize – 45%

Arrange over on the right-hand edge of the oval frame :


Open up “_bow 2” from the kit

Copy – Paste – As New Layer and rename “bow”

Image – Resize - 22%

Image – Free Rotate


Arrange on top of the string above the sign we just placed


Highlight layer “wordart2”

Open “_bird” from the kit

Copy – Paste – As New Layer and rename “bird”

Image – Resize – 45%

Arrange them so they are sitting on top of the letter “R” in Spring


Open up “_frog” from the kit

Copy – Paste – As New Layer and rename “frog”

Image – Resize – 24%

Arrange them so they are sitting by the letter “S” in the Spring wordart


Open up “_ladybug” from the kit

Copy – Paste – As New Layer and rename “ladybug”

Image – Resize – 20%

Image – Free Rotate :


Adjust – Sharpness – Sharpen

Arrange over on the top right-hand edge of the oval frame


Open up “_lights” from the kit

Copy – Paste – As New Layer and rename “lights”

**If you would like to resize your tag, now is the time to do so**

Add your name and all copyrights.
Save your finished tag and you’re done!


Monday, 29 April 2013

"Furry Friends" - Tutorial (PTU Kit)


**Supplies Needed**

Tube & Kit of choice. I'm using a new release by Ismael Rac called “2013Girl” and the matching kit.  You can buy them over at his store here

Template by me, which you can download here

Mask by Vix – BigMask008 from here


**Plugins**

None


Open up your tube of choice
Shift + d to duplicate
Close the original
Minimize your copied tube for the moment

Open up your template
Shift + d to duplicate
Close the original
Delete/hide the “copyright” layer

Highlight the “large heart” layer

Selections – Select All – Float – Defloat

Layers – New Raster Layer and rename “large heart1”

Choose your floodfill tool

Open up “Paper 10” from the kit

Change your background to the paper

Angle 0, Scale 100


Fill your selection

Selections – None

Delete the “large heart” layer

Highlight the “small heart” layer

Selection – Select All – Float – Defloat

Layers – New Raster Layer and rename “small heart1”

Open up “Paper 2” from the kit

Change your background to the paper

Angle 0, Scale 100

Floodfill your selection

Selections – None

Delete layer “small heart”


Still with “Paper 2” as your background

Highlight the “small paws” layer

Grab your “Change To Target” brush

Recolour the paws with Paper 2

Highlight the “large paw” layer

Recolour this layer too with Paper 2

Highlight the “circles” layer

Open up “Paper 3” from the kit

Change your background to this paper

Angle 0, Scale 100

Grab your “Change To Target” brush again

Recolour the circles using Paper 3

Adjust – Add/Remove Noise – Add Noise

Gaussian, Monochrome, 33%

Still with “Paper 3” as your background

Highlight the “wordart2 bg” layer

Grab your “Change To Target” brush

Recolour the wordart background with Paper 3

Change your background to #ec97ff

Grab your Floodfill tool

Highlight layer “bg”

Layers – New Raster Layer

Rename “mask”


Floodfill with your background colour


Layers – Load/Save Mask – Load Mask From Disk

Find “Vix_BigMask008” with these settings :


Highlight the “large heart border” layer

Grab your tube

Copy – Paste – As New Layer and rename “tube”


Arrange in the middle of your tag over the center of the main heart

Once happy

Layers – Duplicate and rename “tube1”


Drag this layer down in your layer palette until it is below the “large heart border” layer

Hide your “tube” layer for a moment

Highlight your “large heart border” layer

Grab your “Magic Wand” tool

Select the inside of the heart frame

Selections – Modify – Expand by 2 Pixels

Selections – Invert

Grab your Eraser Tool

Highlight your “tube 1” layer

Erase any overhang of your tube from the bottom of the heart

Selections – None

Add a drop shadow of choice

Un-hide and highlight layer “tube”

With your Eraser Tool, carefully erase any overhang of your tube from the bottom of the heart again

At this point, please don't feel you need to add exactly the same elements as I have from the kit. I have included my choices below for guidance only if peeps wish to do so.

Highlight layer “large heart1”

Open up the “Lights” element from the kit

Copy – Paste – As New layer and rename “lights”

Arrange across the top of the large heart

Add a drop shadow of choice

Change the Blend Mode to “Hard Light”

Highlight the “large heart border” layer

Open up “Ribbon3” from the kit

Copy – Paste – As New Layer and rename “ribbon3”

Arrange it over on the top-left of the heart border

Add a drop shadow of choice

Highlight the “large paw” layer

Open up “Ribbon1” from the kit

Copy – Paste – As New Layer and rename “ribbon1”

Arrange along the bottom of the smaller heart like so :


Add a drop shadow of choice

Open up the “Dog” element from the kit

Copy – Paste – As New Layer and rename “dog”

Arrange over on the bottom-right side of your tag like so :


Add a drop shadow of choice

Open up the “Kitten” element from the kit

Copy – Paste – As New Layer and rename “kitten”

Arrange just to the left of the dog we just placed like so :


Add a drop shadow of choice

Highlight layer “wordart1”

Open up “Fairy Dust 1” from the kit

Copy – Paste – As New Layer and rename “dust”

Open up the “Bird” element from the kit

Copy – Paste – As New Layer and rename “bird”

Arrange above the small heart on the left-hand side of your tag like so :


Add a drop shadow of choice


**If you would like to resize your tag, now is the time to do so**

I resized mine by 70%

Add your name and all copyrights.
Save your finished tag and you’re done!