

(Please click the image to show full-size tag. Thanks!)
This tutorial was written on Monday, March 19th 2012 by Mystery Designs. It was written in PSP X2 and assumes a good, working knowledge of the program. Any similarity to other tutorials is purely coincidental and not done intentionally. Please do not copy or claim the tutorial as your own. If you wish to do so, please link to my blog should groups or forums use it in challenges, and please leave me a comment with a link to where it is being used. Thanks :)
**Supplies Needed**
Tube(s) of choice. I am using two gorgeous tubes from Zindy Nielsen which are both ftu (free to use). Information about how to obtain them and their use can be gotten over on her website here
Scrapkit of choice. I am using a sweet freebie kit called “Prince Charming” by Imaginative Designz which you can pick up here
Mask of choice. I am using two masks by Signature Collections (#41 & #77) which you can collect on her blog here and here
Font of choice.
WHEN DOWNLOADING SUPPLIES, PLEASE TAKE A MOMENT TO THANK THESE WONDERFUL DESIGNERS WHO SHARE THEIR AMAZING WORK AND TIME SO FREELY. THANKS!
**Plugins**
None
Ready? Lets begin.....
Open a new image – Canvas Size – 800 x 800 pixels
Don't worry, this is just to give us room to work.
We can resize later on :)
Open up your tube(s) of choice
press shift + d to duplicate
Close the original(s)
Open up “IDz_princecharming_cluster1” from the kit
Copy – paste as new layer and rename “Frame”
Image – resize – 35%
Using your Magic Wand tool with these settings :

Select the inside of both hearts that make up the cluster frame
Selections – Modify – Expand – 5 pixels
Layers – New Raster Layer - rename “Paper1”
Open up Paper 5 from the kit
Copy – paste – into selection
Selections – none
Layers – Arrange – Move Down
Highlight your “Frame” layer
Using your Magic Wand again, select just the inside of the top-left heart
Selections – Modify – Expand – 5 pixels
Layers – New Raster Layer - rename “Paper2”
Open up Paper 10 from the kit
Copy – paste – into selection
Selections – none
Lower the opacity of this layer to around 63
Layers – Arrange – Move Down
Highlight your “Frame” layer again
Again with the Magic Wand, select the inside of the top-left heart
Selections – Modify – Expand – 5 pixels
Copy – paste your first tube as a new layer and rename “Tube1”
Position it over the top-left heart until you are happy with the placement
Selections – Invert and hit delete
Selections – none
Layers – Arrange – Move Down
Highlight the “Raster1” layer
Selections – Select All
Highlight your “Tube1” layer again
Image – Crop To Selection
This should remove any excess tube that we cannot see which could cause problems later should you choose to resize ;)
Change the Blend Mode of this layer to “Luminance (Legacy)”
Lower the opacity to around 59
Highlight your “Frame” layer once again
Using your Magic Wand, select the inside of the bottom-right heart
Selections – Modify – Expand – 5 pixels
Copy – paste your second tube as a new layer and rename “Tube2”
Position it over the bottom-right heart until you are happy
Selections – Invert and hit delete
Selections – none
Layers – Arrange – Move Down
Change the Blend Mode of this layer to “Luminance (Legacy)”
Lower the opacity to around 69
Highlight the “Raster1” layer
Selections – Select All
Highlight your “Tube2” layer again
Image – Crop To Selection to remove any excess again
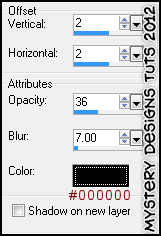
Highlight your “Frame” layer and add a drop shadow of choice.
I am using the following :
Open up “IDz_princecharming_el16” from the kit
Copy – paste – as new layer and rename “El1”
Position over the top-left heart until you are happy
Lower the opacity to around 85
Layers – Arrange – Send To Bottom
Still with your “El1” layer highlighted
Open up “Idz_princecharming_el19” from the kit
Copy – paste – as new layer and rename “El2”
Position it over to the right a little so it sits behind the bottom-right heart
Add a drop shadow
Still with this layer highlighted
Open up “Idz_pricecharming_el15” from the kit
Copy – paste – as new layer and rename “El3”
Position it behind the bottom-right heart
Lower the opacity to around 85
Hightlight your “Raster1” layer and rename this “Mask1”
Layers – Arrange – Send To Bottom
Selections – Select All
Open up Paper 5 again from the kit
Copy – paste – into selection
Selections – none
Layers – Duplicate and rename “Mask2”
Hide this layer for the moment
Highlight your “Mask1” layer
Layers – Load/Save Mask – From Disk
Choose “Mask41” with these settings :
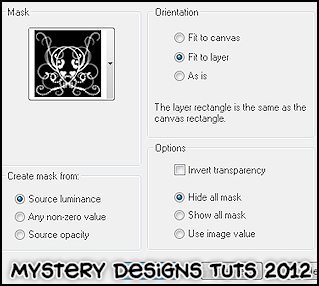
Un-hide and highlight your “Mask2” layer
Layers – Load/Save Mask – From Disk
Choose “Mask77” with the same settings as before
Lower the opacity to around 72
**If you wish to resize your tag, now is the time to do so**
I resized this particular tag to 75% it's original size
Add your name and all copyrights.
Save your finished tag and you’re done!

2 comments:
This is really cool! Nice work, hun...thank you too for using my kit on this tutorial of yours. Have this posted on my blog too...
Hi Lianne, bless you, you are very kind. And thankYOU for having such beautiful kits to work with. It was a pleasure and thanks for posting this up on your blog. *huggs* Debs aka Mystery Designs xx
Post a Comment