
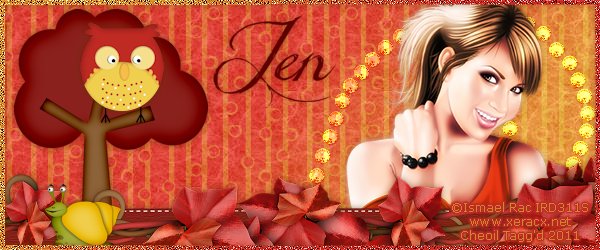
(Please click the image above to bring up the full-size tag. Thanks!)
This tutorial was written on Monday, November 7th 2011 by Mystery Designs. It was written in PSP X2 and assumes a good, working knowledge of the program. Any similarity to other tutorials is purely coincidental and not done intentionally. Please do not copy or claim the tutorial as your own. If you wish to do so, please link to my blog should groups or forums use it in challenges, and please leave me a comment with a link to where it is being used. I'd love to see any results of the tutorial, so please feel free to mail me here with your tags and I would be delighted to display them here on my blog for others to see :)
**Supplies Needed**
Tube of choice. I am using the fabulous art of ©Ismael Rac. He is a PTU artist, and you can find his work over here
Scrapkit of choice. I am using the gorgeous and cute kit called “Colors Of Fall” by Sleek N Sassy Designz. You can purchase it over at the store here Thankyou ever so much Jen!
Font of choice
**Plugins**
Filters Unlimited 2.0
WHEN DOWNLOADING SUPPLIES, PLEASE TAKE A MOMENT TO THANK THESE WONDERFUL DESIGNERS WHO SHARE THEIR AMAZING WORK AND TIME SO FREELY. THANKS!
Ready? Lets begin.....
Open up a new image 600 x 250 pixels
Choose two colours and set them as your foreground and background. I am using #bf2a23 and #cf872e
Change your background to gradient with the following settings :
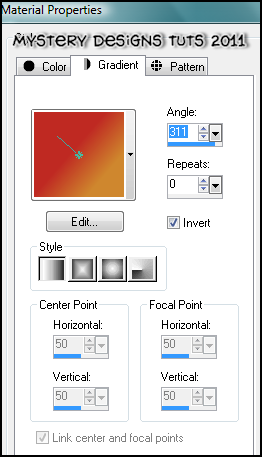
Floodfill your canvas
Effects – plugins – Filters Unlimited 2
Paper Textures – Fibrous Paper, Coarse with the default settings (Intensity 88, Lightness 128)
Open up “Paper_7” from the kit
Copy – paste – as new layer and rename this “bg”
Change the blend mode of this layer to “screen” and lower the opacity to around 65%
Open up “Swirl_1” from the kit
Copy – paste – as new layer and rename “swirl”
Move it so that it is over to the right of the tag and change the blend mode to “overlay”
Open up your tube
Press shift + d to duplicate it and close the original
Copy – paste – as new layer and rename this “tube”
Position to the right of the tag over the top of the swirl
Open up “Tree_2” from the kit
Copy – paste – as new layer onto your tag and rename this layer “tree”
Image – resize 40%
Move it to the left-hand side of your tag and add a drop shadow
Open up “Ribbon_Tag_5” from the kit
Copy – paste – as new layer and rename this layer “ribbon”
Position it along the bottom of your tag (see my tag for reference) and add a drop shadow
Open up “Owl_1” from the kit
Copy – paste – as new layer and rename this layer “owl”
Image – resize 17%
Move your owl so it is perched in the tree and add a drop shadow
Open up “Swirly Ivy_1” from the kit
Copy – paste – as new layer and rename “ivy”
Image – rotate – free rotate with these settings :
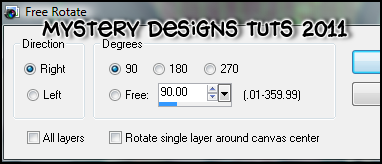
Position along the bottom of your tag and add a drop shadow
Open up “Snail_2” from the kit
Copy – paste – as new layer and rename “snail”
Image – resize 17%
Move so it is below your tree and add a drop shadow
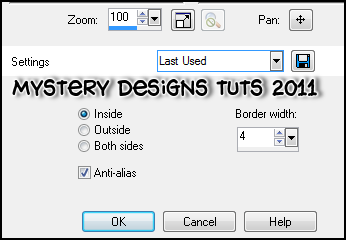
Layers – new raster layer, rename this layer “border”
Selections – select all – modify – selections border with the following settings :
Using your gradient from before, but with invert un-checked, floodfill the selection
Selections – none
Adjust – noise – add/remove noise with these settings :
Random, Monochrome, 50 %
Adjust – sharpness – sharpen and add a drop shadow
Add your name and all copyrights.
Save your tag and you’re done!

No comments:
Post a Comment