

This tutorial was written on Tuesday, September 27th 2011 by Mystery Designs. It was written in PSP X2 and assumes a good, working knowledge of the program. Any similarity to other tutorials is purely coincidental, and not done intentionally. Please do not copy or claim the turorial as your own. If you wish to do so, please link to my blog should groups or forums use it in challenges, and please leave me a comment with a link to where it is being used. I'd love to see any results of the tutorial, so please feel free to mail me here with your taggs and I would be delighted to display them here on my blog for others to see :)
**Supplies Needed**
Tube of choice with close-up. I am using the amazing art of ©Ismael Rac. He is a PTU artist, and you can find his work over here
The cute Scrapkit from Gina's Gems "Flirty Girly Princess" here
My "Classy and Faabulous" template which can be found on my blog here
A mask of choice - I am using mask 353 from Weescotslass Creations, which you can find on her blog here
Font of choice
WHEN DOWNLOADING SUPPLIES, PLEASE TAKE A MOMENT TO THANK THESE WONDERFUL DESIGNERS WHO SHARE THEIR AMAZING WORK AND TIME SO FREELY. THANKS!
**Plugins**
Eye Candy - Gradient Glow
Ready? Lets begin.....
Open up the template in PSP
Press shift + d to duplicate it
Close the original
On the duplicate, delete the copyright layers
Open up your tube and close-up
press shift + d to dulplicate them
Close the originals
Copy and paste your main tube onto the template
Move the tube to the left and drag it so it is below the wordart and crown *note, you may need to move the star layer to achieve this*
Add a drop shadow of choice
Copy and paste your close-up tube so it is above the "square" layer
Highlight the "square" layer
Selections - select all - float - defloat - invert selection
Highlight the close-up tube layer
Hit delete on the keyboard
Highlight the "square" layer again
Selections - select all - float - defloat
Open up Paper 3 from the scrapkit
Selections - select all - copy
Back to the square layer - paste - into selection - selections - none
Highlight your close-up tube layer
Layers - duplicate
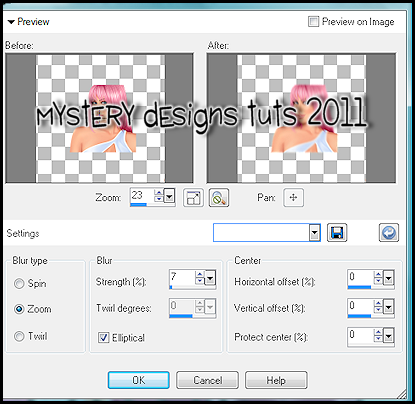
On the duplicate layer go to adjust - blur - radial blur with these settings:
Change the layer blend mode to "hard light"
Highlight the original close-up tube layer
Add the same drop shadow as before
Highlight the "large rectangle" layer
Selections - select all - float - defloat
Layers - new raster layer
Open up Paper 6 from the scrapkit
Selections - select all - copy
Back to the new raster layer - paste into selection
Selections - select none
Delete the "large rectangle" layer
Apply the following Gradient Glow to your new raster layer :
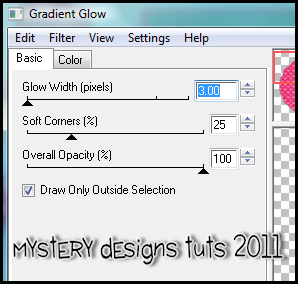
Glow Width : 3
Soft Corners : 25
Overal Opacity : 100
Draw Only Outside Selection checked
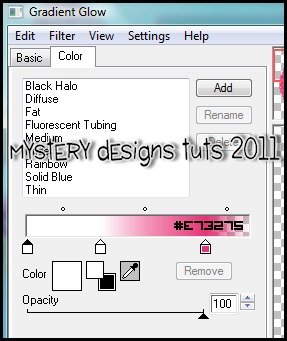
Colour : white, white and #e73275 (see image below for placement)
Highlight the "large circle" layer
Selections - select all - float - defloat
Layers - new raster layer
Open up Paper 5 from the scrapkit
Selections - select all - copy
Back to the new raster layer - paste into selection
Selections - select none
Delete the "large circle" layer
Repeat Gradient Glow with the same settings to your new raster layer
Highlight the "small circle" layer
Selections - select all - float - defloat
Layers - new raster layer
Open up Paper 4 from the scrapkit
Selections - select all - copy
Back to the new raster layer - paste into selection
Selections - select none
Delete the "small circle" layer
Repeat Gradient Glow with the same settings to your new raster layer
Highlight the "small rectangle left" layer
Selections - select all - float - defloat
Layers - new raster layer
Open up Paper 2 from the scrapkit
Selections - select all - copy
Back to the new raster layer - paste into selection
Selections - select none
Delete the "small rectangle left" layer
Repeat Gradient Glow with the same settings to your new raster layer
Highlight the "small rectangle right" layer
Selections - select all - float - defloat
Layers - new raster layer
Copy Paper 2 from the scrapkit again
Back to the new raster layer - paste into selection
Selections - select none
Delete the "small rectangle right" layer
Repeat Gradient Glow with the same settings to your new raster layer
Highlight the "stars" layer
Add a drop shadow of choice
Highlight the "lips" layer
Selections - select all - float - defloat
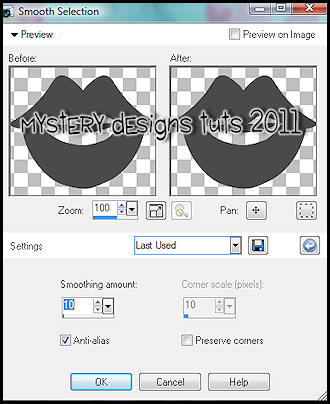
Selections - modify - smooth with the following settings :
Smoothing Amount : 10
Anti-alias checked
Layers - new raster layer
Using your floodfill tool, fill this new layer with colour #e73070
Selections - select none
Delete the original "lips" layer
Repeat these steps for the "crown" layer only in additon add a Gradient Glow using the same settings as earlier on in the tutorial
Highlight the "small circle frame" layer and apply the Gradient Glow settings as before
Repeat this step for the 3 wordart layers and the "square frame" layer
Close off all layers except the 3 wordart layers
Merge all - merge visible
Apply a drop shadow of choice
Unhide all the other layers
Highlight the "lips" layer
Adjust - add/remove noise - add noise with the following settings :
Gaussian - Noise 35% - Monochrome
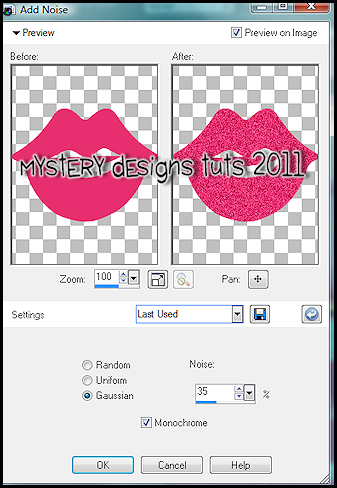
Adjust - sharpness - sharpen
Apply the same Gradient Glow settings as before
Open up "satin bow" Copy and paste it on the top right corner of the square frame.
Resize by 75% and apply a drop shadow of choice
Highlight the bottom layer
Layers - new raster layer
Floodfill with the colour #f77d9a
Still with this layer highlighted, go to layers - load/save mask - load mask from disk
Select Weescotslass Mask 353 and apply with the following settings :
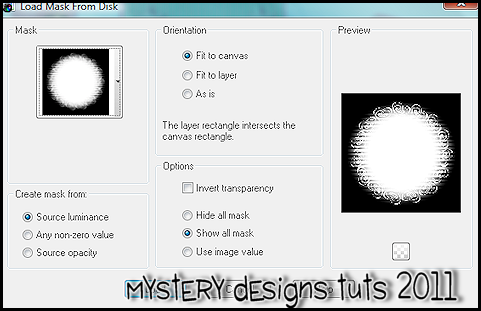
Resize mask layer by 110%
Add any names, and all copyrights etc then save your finished tag and your done!

2 comments:
Love the tag and tut, easy to follow but the mask you used is WSL353 not WSL354. Thank you Jean.
Yikes, thanks ever so much Jean, I will get it altered now :) Thankyou too for your kind comment about the tag and tut :) x
Post a Comment