
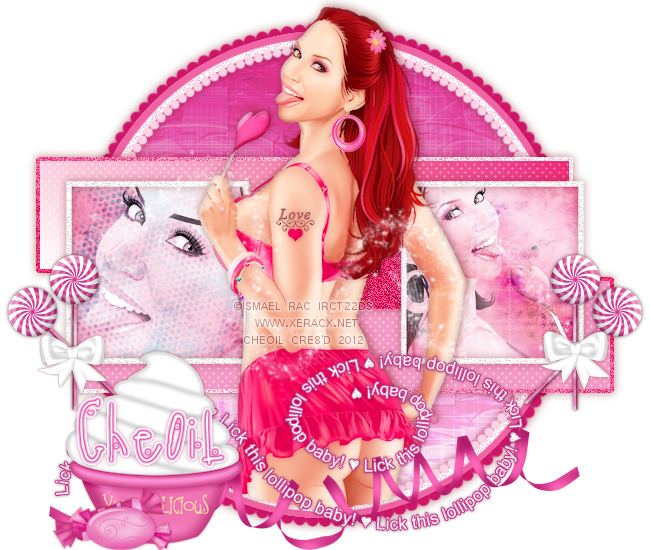
(Please click on the image above to bring up the full size tag. Thanks!)
This tutorial was written on Tuesday, February 28th 2012 by Mystery Designs. It was written in PSP X2 and assumes a good, working knowledge of the program. Any similarity to other tutorials is purely coincidental and not done intentionally. Please do not copy or claim the tutorial as your own. If you wish to do so, please link to my blog should groups or forums use it in challenges, and please leave me a comment with a link to where it is being used. Thanks :)
This tutorial was written on Tuesday, February 28th 2012 by Mystery Designs. It was written in PSP X2 and assumes a good, working knowledge of the program. Any similarity to other tutorials is purely coincidental and not done intentionally. Please do not copy or claim the tutorial as your own. If you wish to do so, please link to my blog should groups or forums use it in challenges, and please leave me a comment with a link to where it is being used. Thanks :)
**Supplies Needed**
Tube of choice. I am using a cute Rac girl which you can purchase at the Xeracx store here
Scrapkit of choice. I am using a sweet FTU kit called “Candy Treats” by Kittz which you can collect from her blog here
Template of choice. I am using a freebie template by Kristin – Template 146 which you can download from her blog here
Textures of choice. I am using a pretty set of paper textures by Aqua (Texture Pack 5) which you can get from her Deviantart site here
Font of choice.
WHEN DOWNLOADING SUPPLIES, PLEASE TAKE A MOMENT TO THANK THESE WONDERFUL DESIGNERS WHO SHARE THEIR AMAZING WORK AND TIME SO FREELY. THANKS!
**Plugins**
None
Ready? Lets begin.....
Open up the template in PSP
Press shift + d to duplicate it
Close the original
On the duplicate, delete the Credits and Tone 1 layers
Open up your tube of choice
press shift + d to duplicate it
Close the original
Highlight the "Lollipops" layer
Copy and paste your tube as a new layer and rename “Tube1”
Place it in the middle of your tag
Layers – duplicate and rename “Tube2”
Drag this layer down so that it is below the “Frame1” layer and close off the visibility
Highlight the “Circle” layer
Selections – select all – float – defloat
Selections – invert
Highlight your “Tube1” layer
Using your eraser tool, wipe out all the tube hanging over the bottom of the circle
Unhide “Tube2” and repeat this step
Selections – none
Add a drop shadow of choice to the “Tube1” layer
You may get some residual shadow at the very bottom of your tag.
If you do, simply use your eraser tool to clear this.
Highlight the “Frame Back 2” layer
Selections – select all – float – defloat
Set your foreground and background to two complimentary colours from your tube.
I am using #e9a0c2 and #ce1669
Change your background to gradient – foreground/background with these settings :
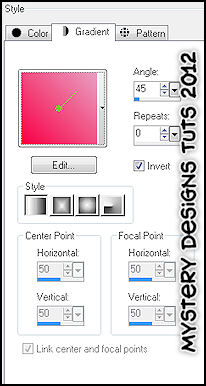
Floodfill your selection with your gradient
**Do Not Deselect**
Layers – new raster layer and rename “Texture1”
Open up Texture 53 from the pack (AR315_Texture_053)
Copy – paste – into selection
Change the blend mode of this layer to Hard Light
Lower the opacity to around 63 (or whatever works best for the texture you have chosen)
**Do Not Deselect**
Copy – paste your tube as a new layer and rename “Tube3”
Position over the selected area until you are happy
Selections – invert – delete
Selections – none
Still with “Tube3” layer highlighted
Adjust – Hue and Saturation – Colorize with these settings :

Change the blend mode to Hard Light
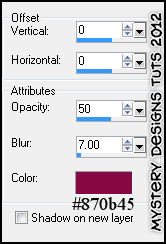
Highlight the first “Frame2” layer and add a drop shadow of choice. I am using the following :
Highlight the “Frame Back 1” layer
Selections – select all – float – defloat
Using your floodfill tool again and the same gradient, fill your selection
**Do Not Deselect**
Layers – new raster layer and rename “Texture2”
Open up Texture 54 from the pack (AR315_Texture_054)
Copy – paste – into selection
Change the blend mode of this layer to Hard Light
Lower the opacity to around 71 (or whatever works best for the texture you have chosen)
**Do Not Deselect**
Copy – paste your tube as a new layer and rename “Tube4”
Position over the selected area until you are happy
Selections – invert – delete
Selections – none
Still with “Tube4” layer highlighted
Adjust – Hue and Saturation – Colorize with the same settings as before
Highlight the second “Frame2” layer and add a drop shadow of choice.
I am using the same one as before.
Highlight the “Circle” layer
Selections – select all – float – defloat
Layers – new raster layer and rename “Texture3”
Open up Texture 55 from the pack (AR315_Texture_055)
Copy – paste – into selection
Selections – none
Using your Change to Target brush (the one that looks like a bullseye) recolour the paper using your foreground colour from before. I am using #e9a0c2
Change the blend mode to Hard Light and lower the opacity to around 30
Highlight the “Frame1” layer
Adjust – Hue and Saturation – Colorize with the same settings as before
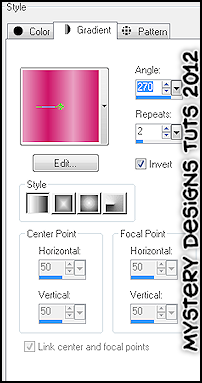
Using your Change to Target brush again, recolour the frame using your gradient from before but set as follows :
Add a drop shadow of choice
Highlight the “Glittered Rectangle 1” layer
Colour using your Change to Target brush again with the same gradient settings
Add a drop shadow
Highlight the “Rectangle 1” layer
Repeat the colouring step again with the same settings
Highlight the “Glittered Rectangle 2” layer
Once again repeat the colouring step with the same settings
Add a drop shadow of choice
Highlight the “Rectangle 2” layer
Colour using your Change to Target brush, but this time use the foreground colour (#e9a0c2)
Highlight the “Sm Rectangle” layer
Colour again using your Change to Target brush and the foreground colour
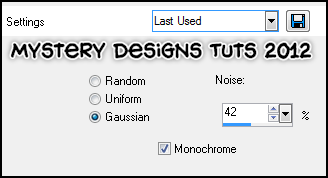
Adjust – noise – add/remove noise with these settings :
Adjust – sharpness – sharpen
Add a drop shadow
Highlight the “Lollipops” layer
Add a drop shadow
Highlight your “Tube1” layer
Open up “CT-Scrumptions Bow3” from the kit
Copy – paste – as new layer and rename “Bow1”
Image – resize – 39%
Move over so that it covers the cross of the lollipop sticks to the left of your tag
Add a drop shadow
Layers – duplicate and rename “Bow2”
Move over so that it covers the lollipop sticks to the right of your tag
Open up “CT-Curled Ribbon 2” from the kit
Copy – paste – as new layer and rename “Ribbon”
Move so that it sits along the bottom of your tag
Add a drop shadow
Open up “CT-Cupcake2” from the kit
Copy – paste – as new layer and rename “Cupcake”
Image – resize – 60%
Move to the bottom left of your tag
Add a drop shadow
Open up “CT-Sweet1” from the kit
Copy – paste – as new layer and rename “Sweet1”
Image – resize – 40%
Image – flip
Move so that the sweet rests to the left of the cupcake
Add a drop shadow
Open up “CT-Sweet2”
Copy – paste – as new layer and rename “Sweet2”
Using your Change to Target brush again, foreground colour from before, colourise the sweet
Image – resize – 40%
Move so that the sweet sits below the previous sweet
Open up “CT-Glitter Swirl” from the kit
Copy – paste – as new layer and rename “Glitter”
**If you wish to resize your tag, now is the time to do so**
Add your name and all copyrights.
Save your finished tag and you’re done!

No comments:
Post a Comment